GuideExperimental
Migrate a Wodby 1 app to Wodby 2
Do you need to migrate to Wodby 2? Start by deciding what you want to gain, then ask Wodby Agent in the Wodby 2 dashboard to move one Wodby-managed Drupal or WordPress instance, and cut over only after testing the imported target.
Do you need to migrate to Wodby 2?
If your team needs more freedom to customize apps, more room to grow, or less repetitive maintenance, Wodby 2 may help. Read Why migrate from Wodby 1 to Wodby 2? for the main benefits, practical examples, and help deciding whether the move is right for you.
Wodby 1 continues to receive updates. If your current setup meets your needs, a move to Wodby 2 does not have to be your next step. Replacing an Infrastructure 6 server with an Infrastructure 7 server is a separate Wodby 1 workflow; see the Wodby 1 infrastructure and migration update. Once you have chosen Wodby 2, follow the preview-first workflow below.
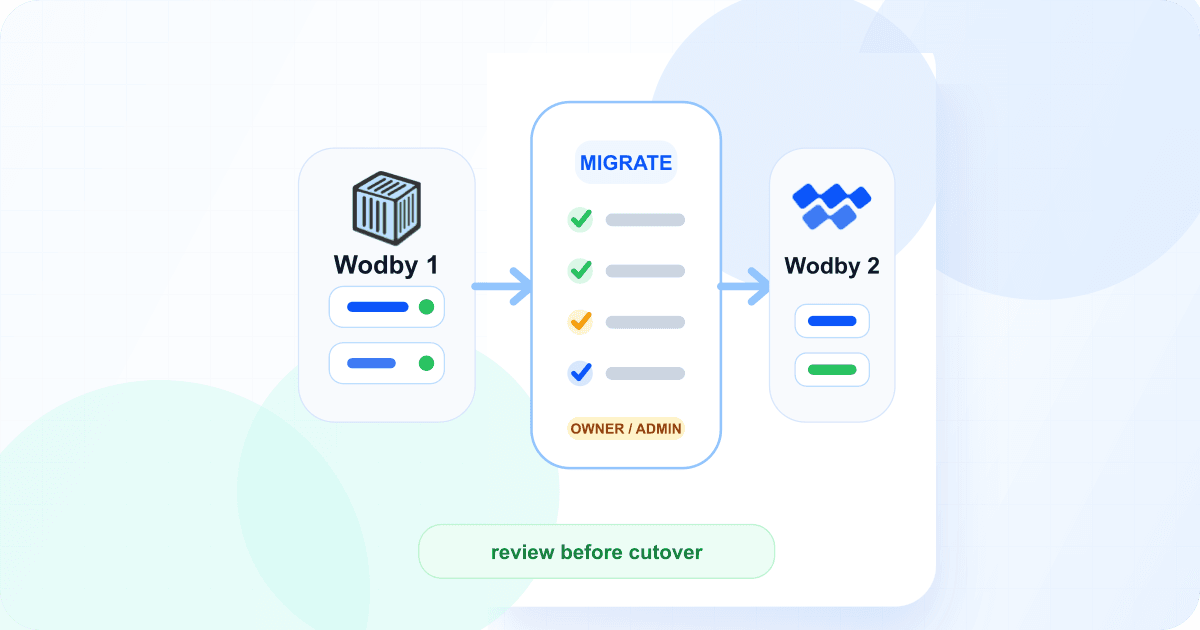
TL;DR: ask Wodby Agent in the dashboard
Add your Wodby 1 API key to Wodby 2 as a Wodby 1 integration, open Chats in your Wodby 2 organization, and ask:
Migrate the prod instance of my Wodby 1 app example to the cluster main.Wodby Agent previews the migration, explains what needs your decision, and starts it only after you approve. Test the app on its technical URL, change DNS, then ask the agent to verify the migration.
Prefer the command line? Preview with Wodby CLI, then rerun the same command with --apply:
wodby migrate wodby1 instance SOURCE_INSTANCE_UUID \
  --target-cluster TARGET_CLUSTER
See With Wodby CLI: install and authenticate, and the With Wodby CLI box of each step.
This guide is primarily for customers moving Wodby 1 managed Drupal and WordPress stacks to compatible managed stacks on Wodby 2. The primary workflow migrates exactly one selected Wodby 1 app instance and assumes you may not have used Wodby 2 before.
Migration to Wodby 2 is experimental.
Wodby Agent and Wodby CLI 2.12.0 run the same migration. Preview and review each migration before applying it, begin with a suitable non-production instance, and keep the Wodby 1 source intact until verification and the agreed rollback window are complete.
Organization owners and admins can run it.
You must be an active owner or admin of both the source Wodby 1 organization and the selected target Wodby 2 organization. A Wodby platform or global administrator role does not replace either organization membership. An app-specific role alone is not sufficient. With Wodby Agent, the Wodby 1 API key in the integration must belong to such a Wodby 1 user, and you must be an owner or admin of the Wodby 2 organization you chat in.
How the migration works
In Wodby 2, an app can belong directly to an organization or to one of its projects. Each app environment uses a stack and an environment type, and runs on a Kubernetes cluster. Wodby CI can connect the app's buildable service to Git, build the repository, and deploy it to that cluster.
You ask Wodby Agent in your Wodby 2 organization's Chats to migrate one Wodby 1 instance, every instance of an app, or every app on a server. Wodby CLI runs the same migration from a terminal. Either way the migration has three steps:
- Preview: it reads Wodby 1 and the selected Wodby 2 target and shows the complete plan: what is created where, what each service and setting maps to, and every blocker and warning. Nothing changes on either platform.
- Apply: after you approve the plan, it creates the target, deploys it with its routes, imports the selected backup, and records checkpoints so an interrupted run continues where it stopped.
- Verify: after you test the app on its technical URL and change DNS, it checks DNS, configuration, imports, routes, certificates, and workload health, and enables the migrated cron schedules.
By default, migrating one instance creates a new Wodby 2 app with one app environment for it. You can instead add the instance to an existing app. The selected instance supplies the migration data; the app's other instances are read only to decide which settings belong to the shared stack, and their workloads and data are not migrated.
For your first migration, choose an instance that is representative of the Drupal or WordPress stack and services you will migrate later, but has a manageable data set and cutover risk. Complete its plan, deployment, data import, acceptance, DNS cutover, and verification before widening the migration to other apps. A non-production instance is useful only when it exercises the same important code, services, and data paths as production.
Create the Wodby 2 foundation first.
The migration creates the app and its app environments. It does not create your Wodby 2 organization, optional project, cluster, or integrations. It also does not create a Wodby 1 backup, change DNS, or delete the source app.
What the migration covers
The migration reproduces a compatible app on Wodby 2, transfers its supported configuration and data, and makes the cutover safer. It works best when:
- The source is a Wodby-managed Drupal or WordPress app and a compatible Wodby 2 stack is available.
- You want to preserve supported service states, custom runtime environment variables and secrets, cron schedules, routes and their HSTS policies, basic auth, repository settings, databases, and files.
- A snapshot-based data import is acceptable and you can account for writes made after the selected backup.
- You want a reviewed plan, resumable operations, and health checks around the cutover.
You can also leave code or data to your own process: ask the agent to skip code when your CI pipeline deploys it, or to skip data when you move databases and files with a separate tested procedure. When code is skipped, services that need it, such as Varnish in front of Nginx, wait until you deploy it. If files are imported into storage that a code service mounts, for example the NFS storage of a WordPress or Drupal app, the migration pauses before that import and names the service to deploy. Deploy it, then ask the agent to continue.
With Wodby CLI
Use --skip-code or --skip-data on every run, and rerun the same --apply command to continue after a pause.
Primary path: managed Drupal and WordPress stacks
For a managed Drupal or WordPress app, the recommended default is a new app-specific stack duplicated from the compatible public Wodby 2 catalog stack. The migration configures that stack before it creates the app, and all selected instances of one source app reuse it. A server migration creates one new stack per source app, not one stack per instance or one shared stack for the server. The preview shows and pins the exact catalog stack revision, services, versions, build source, and import capabilities before apply.
- WordPress: use the compatible managed WordPress stack. The migration can transfer supported configuration, repository code, the database, and files/uploads.
- Drupal: use a compatible managed Drupal stack for the application's current major version. The migration can transfer supported configuration, repository code, the database, and public or private files exposed by the Wodby 1 backup.
- Forked managed Drupal or WordPress stacks: these remain on the managed migration path when their Wodby 1 metadata identifies the Drupal or WordPress family. The migration starts from the managed Wodby 2 catalog stack, transfers the fork's custom defaults, and adds exact mapped Wodby 2 services needed by the fork. Renamed or otherwise ambiguous additions need an explicit mapping, which the preview asks for.
- Fully custom stacks: choose a pre-created Wodby 2 stack and map every enabled service explicitly. The migration moves custom and default environment values to the mapped services, but does not recreate source images, ports, workloads, or volumes.
Choose an existing target stack only when you deliberately want it instead of the per-app catalog copy. The selected stack still has to pass the complete review; the migration does not silently modify an unrelated existing stack beyond the reviewed configuration.
Do not treat migration as an upgrade.
The migration does not upgrade Drupal core, contributed modules, custom code, or the database schema to a new Drupal major version. Complete and test that application upgrade separately. Likewise, do not combine a major WordPress architecture change with the platform cutover unless you have tested the resulting code and data yourself.
Drupal 7 is blocked from the managed path. For Drupal-family stacks, the migration checks the effective NGINX_VHOST_PRESET value on the Wodby 1 nginx service. A preset such as drupal10 or drupal11 is used as the inferred Drupal major even when the original stack metadata still says Drupal 8 or 9. This inference is shown as a warning for confirmation. Drupal 8 or 9 remains blocked when the preset does not identify Drupal 10 or newer; if you confirmed that the application was upgraded, tell the agent so. The migration does not inspect application code or composer.lock, so you remain responsible for validating the real Drupal version before apply.
Database and files migration requires matching import capabilities in the target stack. Repository migration requires an enabled connect-build service; apps without a usable linked repository use the automatic Custom CI path. Same-name services map automatically when unambiguous, while renamed services need an explicit mapping. The built-in compatibility policy maps athenapdf to gotenberg, mailhog to mailpit, pma to phpmyadmin, redis to valkey, and varnish to vinyl. Wodby 1 sshd uses the target PHP SSH derivative. The infrastructure-only crond, rsyslog, and xhprof containers are not recreated; application cron entries become Wodby 2 service cron schedules. The preview lists each conversion with its source and target service, schedule, command, and resulting state, and lists every enabled source service that is intentionally not migrated, such as Apache when nginx replaces it, so the omission cannot be mistaken for an ordinary disabled service.
AthenaPDF needs an application change.
The migration replaces the service with Gotenberg and configures a private GOTENBERG_ENDPOINT on PHP, but it cannot convert AthenaPDF API calls, authentication, or stored CMS configuration. See the AthenaPDF migration guide before applying the migration.
The preview also shows every source and target service version. A supported non-EOL source version is preserved. If it is missing, unavailable, disabled by the selected stack, or EOL, the migration highlights the choice and selects the highest supported non-EOL version. Review this as an application compatibility change, and ask the agent for another available version when you need one.
With Wodby CLI
--target-stack-idor a scoped--target-stack-mapselects a pre-created stack.--target-service-map,--target-version-map, and--target-import-mapset services, versions, and imports.--add-missing-services=falserequires you to prepare a forked stack's missing services yourself instead of adding them. This is available in the CLI only.--allow-unsupported-drupalconfirms a Drupal 8 or 9 app that you upgraded to Drupal 10 or newer.
Stack variables, schedules, and integrations
Shared migrated service configuration belongs to the Wodby 2 stack used by the migration. Custom and fork-template variables, service settings, cron schedules, integration links, selected versions, and added services are published as a new stack revision before the app is created. When one source app has several instances, values that differ by target environment type are stored as environment-scoped stack values—for example, a production-only variable remains production-only. When values, versions, or cron schedules differ between source instances of the same environment type, the common configuration remains on the stack and the differing values are applied as explicit app-environment service overrides. The preview shows both levels separately.
When the migration adds an instance to an existing app, it publishes the reviewed configuration as a new immutable revision of that app's stack. The newly migrated app environment uses the new revision. Existing app environments stay pinned to their current revisions, so adding one app environment does not redeploy or reconfigure them.
For managed Drupal stacks and recognized Drupal forks, the migration also preserves the two app-level choices from the Wodby 1 new-app form. The raw Drupal subdirectory maps to the target PHP service docroot setting, and the effective site directory (including default) maps to sitedir. Nginx inherits both values from PHP in the Wodby 2 Drupal stack. The preview blocks if the source export does not include these values or the selected target PHP service does not expose both settings, avoiding a silent fallback to Wodby 2's defaults.
Customer-defined values and protected values are migrated. A protected value is transferred directly in memory and never saved with the plan; a redacted protected value is a blocker. A variable set to an empty value in Wodby 1 is left unset, because Wodby 2 does not store empty values and Wodby images treat an empty variable the same as an unset one. The preview blocks only when the Wodby 2 service or stack sets its own value for that variable; remove the override in Wodby 1 or set the value you need. Wodby 1-generated runtime definitions are not copied because Wodby 2 supplies its own values. To keep application code, scripts, and cron commands that still use the former names working, the migration adds WODBY2_MIGRATIONS_ADD_LEGACY_WODBY1_ENV_VARS=true once at the migrated stack level. Wodby 2 recognizes this migration marker and supplies these platform-owned compatibility variables:
| Compatibility variable | Value supplied by Wodby 2 |
|---|---|
WODBY_INSTANCE_NAME | WODBY_ENV_NAME |
WODBY_ENVIRONMENT_NAME | WODBY_ENV_NAME |
WODBY_INSTANCE_TYPE | WODBY_ENV_TYPE, with staging exposed as the Wodby 1 value stage |
WODBY_ENVIRONMENT_TYPE | WODBY_ENV_TYPE, with staging exposed as the Wodby 1 value stage |
WODBY_HOST_PRIMARY | WODBY_PRIMARY_HOST |
WODBY_URL_PRIMARY | WODBY_PRIMARY_URL |
WODBY_APP_NAME and WODBY_HOSTS keep their existing names. The native WODBY_ENV_NAME contains the Wodby 2 app environment name, and the legacy WODBY_ENVIRONMENT_NAME receives the same value. The preview shows one migration-wide compatibility warning so this behavior is visible before you apply the migration.
The compatibility layer does not recreate source UUIDs, legacy Kubernetes namespaces, old database connection variables, or implementation-specific filesystem paths. Drupal docroot and site directory values are migrated through the target PHP service settings instead. After application code and commands use the native Wodby 2 variables, remove the marker from the stack service configurations and publish a new stack revision.
The migration also rewrites the known MailHog-to-Mailpit SMTP host and port references. When cache_redis or cache_valkey is enabled, the migration preserves the cache through the mapped service. When the corresponding setting is explicitly false, the mapped Wodby 2 Valkey service is disabled. Wodby 2's generated salts and managed environment defaults remain target-owned rather than being copied from Wodby 1.
The Wodby 1 mail_service selection is also preserved: opensmtpd links the target PHP service to OpenSMTPD, while mailhog links it to Mailpit. When every source instance of an app has the same selection, the migration configures the sendmail link once on the app's dedicated stack. If source instances use different delivery services, it creates an app-environment-specific PHP link for each resulting app environment instead. For older source instances without mail_service, the legacy php_mail_catcher setting is used as a fallback; when both exist, mail_service is authoritative. If the selected service is disabled in Wodby 1, the instance sends no mail there; the preview warns and no mail link is created.
An OpenSMTPD relay is converted into an app-scoped integration: Brevo and AWS SES are selected when the source credentials can be identified safely; other relays use a Custom SMTP integration named for the app. Values may be scoped by environment type. When only some instances use a relay, the integration is linked to their app environments only, and the others keep delivering mail without one. An existing integration is reused when its provider, scope, and credentials match, which avoids duplicates during app and server migrations. You can relay through a mail provider integration you already use instead; see Choose how the app is built and run.
Backup mirroring is converted separately from the data snapshot being imported. No mirror configuration, or Wodby Cloud storage, maps to Wodby Blob storage; an S3 mirror becomes an AWS S3 integration. Scheduling is evaluated independently. When Wodby 1 automatic backups are enabled, the migration creates enabled automatic presets with the target organization's default daily 02:00–05:00 window and timezone. If the target plan does not allow automatic backups, the Wodby Blob presets are staged disabled and shown as a warning instead. When Wodby 1 automatic backups are not enabled, the preview says so explicitly rather than attributing that state to the absence of a mirror. An S3 preset on a plan without automatic-backup support remains a blocker. Matching credentials are reused and secrets never appear in the saved plan.
Paid features and free-tier behavior
The preview reads the subscription capabilities of the target organization. It shows features that can be staged safely as warnings and stops before target changes when a free-tier limit would make the planned app invalid. Review these results again if you change the target subscription before applying.
Free-tier limits and required cutover actions
| Feature or limit | Free-tier migration behavior | Before production cutover |
|---|---|---|
| Enabled app services | A subscription limit rather than a separately enabled feature. Exceeding the target organization's allowance is a blocker, so the migration does not start. | Disable or remap optional services, free existing capacity, or upgrade. |
| Cron schedules | Migrated schedules are created disabled and the preview shows a warning. Their schedule and command are retained. | Upgrade, then review and enable each schedule that should run. |
| Automatic backups | Wodby Blob backup presets are staged disabled with a warning. An S3 preset that requires automatic backups is a blocker because it cannot be represented safely as the free-tier fallback. | Upgrade and enable the reviewed presets, or configure a supported manual backup workflow. |
| Custom domains | Routes are created disabled and reported as warnings. Disabled routes receive no production traffic and do not reserve the hostname in the cluster. | Upgrade and enable the routes before changing DNS. |
| Custom TLS certificates | A free organization cannot upload or attach a custom certificate. The Wodby 1 private key is never exported; keep the corresponding custom-domain route disabled while TLS remains unresolved. | Upgrade and attach one active matching Wodby 2 certificate, or use a Wodby-managed Let's Encrypt certificate instead. Let's Encrypt avoids the custom-certificate entitlement, but the custom domain itself still requires a paid plan. |
Disabled means staged, not live.
A disabled cron schedule, backup preset, or custom-domain route remains available for review after migration, but it does not perform its production function. Do not treat a successful data import as confirmation that these paid features are active.
Review the current Wodby 2 stack catalog before planning. The migration selects the matching public catalog stack for the managed default, and the plan remains the final app-specific compatibility review.
Set up before you migrate
1. Create the organization and choose app ownership
Sign in to the Wodby 2 dashboard, then create or join the target organization. Your user must be an active organization owner or admin. When the selected cluster is project-owned, the migration defaults the app to that cluster's owner project. An organization-owned cluster defaults to an organization-owned app. Name another project only to choose a different project with access to the cluster. Do not pre-create the app itself: the migration creates it, and an unrelated app with the Wodby 1 app name is a blocker.
The selected stack, cluster, and Git or registry integrations must be compatible with the app's ownership. An organization-owned app must use organization-owned resources. A project-owned app can use resources available to that project. Keep the same ownership choice for preview, apply, and verify.
2. Create a cluster
Finish provisioning a cluster before the preview, and wait until it is ready for app deployments. Choose the model that matches where you want the infrastructure to run:
- Wodby Cloud for a persistent Wodby-hosted cluster and the simplest start.
- Managed Kubernetes when the cluster should run in your supported cloud-provider account and Wodby should provision the Kubernetes layer.
- Self-hosted Kubernetes for a lower-cost single-server deployment on your server or VM.
The migration uses these existing resources; it does not move infrastructure from Wodby 1. For a production migration on Wodby Cloud, use a persistent cluster rather than a temporary demo cluster.
3. Connect Wodby 1
- In the Wodby 1 dashboard, create an API key under Account > API Keys as an owner or admin of the Wodby 1 organization. A key scoped to one organization lets the migration see that organization only.
- In the Wodby 2 dashboard, add an integration with the Wodby 1 provider and enter that key. Never paste a key, password, or token into a chat: a chat keeps what is written in it.
Keep the same key for the whole migration. Protected values the migration needs, such as secret variables and relay credentials, are read with it and passed directly to Wodby 2.
4. Connect Git for Wodby CI
The recommended path for an app deployed from a repository uses Wodby CI. Add a Git integration in the target organization and authorize access to the source repository. The migration finds the repository by the name in the Wodby 1 repository URL and links it while configuring the target app; you do not need its provider-specific ID. Wodby CI builds the branch, tag, or commit that Wodby 1 deployed, unless you ask for another.
For Wodby CI, the repository needs .wodby/pipeline.yml at every selected Git ref; a missing pipeline is a blocker. If the integration does not expose the repository, the preview warns and continues without a repository link, using Custom CI. When the repository has a different name in the integration, or lives on another Git host than the integration's provider, for example a self-hosted GitLab server, give the agent its exact name: a repository with the same name on another host may be a different one, so the preview blocks until you confirm it.
Starting pipelines for managed Drupal and WordPress
For Drupal, copy and adapt the Drupal Vanilla Wodby CI pipeline. You can also copy its optional post-deployment hooks. For WordPress, use the equivalent files from the WordPress Vanilla .wodby directory. Review and adapt the examples for your application instead of copying them unchanged.
Why use Wodby CI for the migration?
The migration can connect the reviewed repository and ref, build the target service, deploy its technical route, and verify its workload before cutover. This keeps code delivery in the same approved and resumable workflow as app configuration and data.
With Wodby CLI
Pass the Git integration with --target-git-integration-id, a different repository name with --target-repository-name OWNER/REPOSITORY, and another ref with --target-git-ref and --target-git-ref-type branch|tag|commit together. Wodby CI is the default; you do not need --target-ci-integration-id for it. The CLI verifies the repository name before any change.
5. Optional: add the other integrations you want to use
A CI integration such as CircleCI, a storage integration for backups, or a mail provider integration. Wodby Agent tells you when one of your choices needs an integration that does not exist yet, and you add it in the dashboard.
With Wodby CLI: install and authenticate
Wodby CLI runs the same migration from your terminal. Instead of the Wodby 1 integration, it reads the Wodby 1 API key from WODBY1_SOURCE_TOKEN, and it uses a Wodby 2 API key. It keeps the plan and resume state in local files.
- Open the Wodby CLI releases and download the Wodby CLI
2.12.0archive for your operating system and CPU architecture. Wodby CLI 1.x targets Wodby 1 and cannot run this migration or deploy to Wodby 2. - Extract the
wodbyexecutable and place it in a directory on yourPATH. On Windows, use the corresponding release executable and a directory included in your user or systemPATH. - Verify both the version and the Wodby 1 migration command before starting.
# After downloading and extracting the release archive on Linux or macOS:
sudo install -m 0755 ./wodby /usr/local/bin/wodby

# Confirm that this version contains the migration command.
wodby version
# The reported Wodby CLI version must be 2.12.0.
wodby migrate wodby1 instance --help
wodby migrate wodby1 app --help
wodby migrate wodby1 server --help
See the Wodby CLI installation documentation for additional installation and authentication details. Use the same CLI version for every run of one migration unless Wodby support directs you to upgrade during a recovery.
Create a Wodby 2 API key: while signed in as a target organization owner or admin, open User API keys, create a key for the target organization with a recognizable migration name, and save it in your secret manager as WODBY_API_KEY. A key belongs to one organization and uses the permissions of the user who created it, so it selects the target organization; there is no --target-org option. A Wodby 2 access token is not accepted.
Load the Wodby 1 key as WODBY1_SOURCE_TOKEN and the Wodby 2 key as WODBY_API_KEY, through a secret manager or another method that keeps both values out of shell history and shared files. The CLI verifies your active owner or admin membership in the Wodby 2 organization, and Wodby 1 verifies the same role in the source organization.
Use the exact same WODBY1_SOURCE_TOKEN for preview, apply, and verify. The CLI uses it to authenticate an integrity fingerprint over protected source configuration, so switching to another valid token changes the fingerprint. Protected values are passed directly to Wodby 2 and never stored in the local plan or state. There is no separate “include secrets” option.
Choose how the app is built and run
The preview keeps your Wodby 1 setup by default. Wodby Agent offers the Wodby 2 options below, each with what it gives you; none is required. Each answer changes the plan, and the agent previews it again before it asks to start.
- Builds: an app deployed from a linked repository uses Wodby CI. An app that Wodby 1 built with third-party CI can keep that CI through a Wodby 2 CI integration, optionally with the repository linked, or switch to Wodby CI. Without a CI integration, the migration uses Custom CI.
- Development workspaces: a dev or staging instance deployed from Git can become a workspace.
- Certificates: a route with a custom certificate can use Let's Encrypt instead, issued and renewed automatically once DNS points to Wodby 2.
- Backups: keep them in Wodby Blob storage, or in your own S3, GCS, Azure, Wasabi, or Backblaze storage, and choose the daily automatic backup window, 30 to 180 minutes in the organization's time zone.
- Mail: relay through a mail provider integration you already use, also for instances that sent mail without a relay, and deliver the mail of staging, test, and development app environments to the stack's Mailpit service, so testing never emails real recipients. Production keeps its delivery.
With Wodby CLI
--target-wodby-ciwith--target-git-integration-idmoves third-party CI instances to Wodby CI;--target-ci-integration-idkeeps them on an existing CI integration.--workspace(instance) or--workspace-instance(app and server) makes workspaces.--target-letsencryptuses Let's Encrypt.--target-backup-integration-idwith--target-backup-bucket, and--target-backup-window HH:MM-HH:MM.--target-smtp-integration-idand--target-catch-mail.
Optional: migrate a Git-deployed instance to a development workspace
A Wodby 1 instance with direct Git deployment runs a checkout of a Git branch on its server. By default, the migration turns it into an app environment that Wodby CI builds and deploys. If your team used that instance to work on code, migrate it to a development workspace instead: an app environment with an editable Git checkout on persistent storage that you or a coding agent change over SSH or with Wodby Agent. Ask for it per instance, and keep production on a CI/CD environment.
The preview checks each selected instance and blocks with the reason when it cannot become a workspace. It never falls back to a CI/CD environment on its own:
- The instance must use direct Git deployment. The workspace starts from the branch, tag or commit it deployed, unless you choose another.
- The repository must be linked through a Wodby 2 Git integration. A workspace is never built, so it needs no
.wodby/pipeline.yml. - The target stack and cluster must support workspaces; the preview shows the reason Wodby 2 gives when they do not.
- An existing cluster needs exactly one default storage class. Otherwise choose a storage class, or an enabled storage service of the stack.
What changes compared with the Wodby 1 instance:
- The workspace works on a new branch,
wodby/workspace-followed by eight characters, started from the ref the Wodby 1 instance deployed. Push that branch and open a pull request to deliver changes. - It is cloned from the repository. Commit and push any change made on the Wodby 1 server before the migration; uncommitted changes are not carried over.
- It belongs to you, the user who runs the migration. Only you can connect over SSH or change its configuration. Add your public key in User settings > SSH keys.
- Code services run one replica, scheduled jobs stay disabled, pushes do not deploy, and repository post-deployment scripts do not run; the service's setup steps run instead. The stack's SSH service stays disabled because the workspace has its own SSH endpoint.
- Its SSH runner counts as one more service toward the target plan's allowance, and the preview includes it.
The migration creates the workspace with the linked repository, deploys it without a build, and waits until Wodby 2 has cloned the repository and run the setup steps. It then imports the database and files as usual. If setup fails, fix the cause, select Retry setup on the app environment's Workspace page, and ask the agent to continue.
With Wodby CLI
# One instance: add --workspace to the arguments used for Wodby CI.
wodby migrate wodby1 instance "${migration_args[@]}" --workspace

# One app: name each instance that should become a workspace.
wodby migrate wodby1 app SOURCE_APP_UUID --target-cluster TARGET_CLUSTER \
  --target-git-integration-id TARGET_GIT_INTEGRATION_ID \
  --workspace-instance dev

# One server: qualify the instance name with its app.
wodby migrate wodby1 server SOURCE_SERVER_UUID --target-cluster TARGET_CLUSTER \
  --target-git-integration-id TARGET_GIT_INTEGRATION_ID \
  --workspace-instance example/dev

# Only when the cluster has no single default storage class:
#   --workspace-storage-class STORAGE_CLASS
# or keep the files on an enabled storage service of the stack:
#   --workspace-storage-service STORAGE_SERVICE

# After apply, show the SSH connection details of the new app environment.
wodby app environment workspace connection ENVIRONMENT_ID
If setup fails, run wodby app environment workspace prepare ENVIRONMENT_ID and rerun the same --apply command. Keep the workspace option on every run, including --verify.
Optional: keep using third-party CI
When a Wodby 1 instance has deployment type ci, has no repository, or cannot use a repository from the selected Git integration, the migration uses third-party CI. It creates or reuses an app-scoped Custom CI integration, attaches it to the buildable service, and needs no Wodby CI pipeline. You can choose an existing CI integration instead, such as CircleCI, GitHub, or GitLab.
Your runner drives third-party CI, so the migration cannot launch its first build. It creates and configures the target and then pauses until you run the updated pipeline once; then ask the agent to continue. It adopts the matching completed build and continues with deployment and data import. Verification cannot succeed until the target workload is healthy with no pending rebuild or redeploy.
Update the CI pipeline for Wodby 2.
Do not reuse a Wodby 1 pipeline unchanged. Install Wodby CLI 2.x in the external runner and authenticate it with a Wodby 2 API key. In Wodby 2, wodby ci init receives the buildable target app service ID through WODBY_APP_SERVICE_ID, rather than the Wodby 1 instance UUID. After initialization, the Wodby 2 flow uses ci run, ci build, ci push, and ci deploy. For a Wodby 1 ci instance, the preview names the CI provider from its current deployed build when available and gives the matching provider-and-stack example.
# Wodby 2 external CI initializes against the buildable app service ID.
wodby ci init "$WODBY_APP_SERVICE_ID"

# Use this form instead when the runner builds through Docker-in-Docker.
wodby ci init --dind "$WODBY_APP_SERVICE_ID"
Start from the provider and build-pattern examples in the Wodby CI examples for Wodby 2. Use the repository's 2.0 branch; its 1.0 branch documents the old Wodby 1 workflow. Use the matching Drupal or WordPress directory and then the provider example the preview names—for example, the Drupal CircleCI configuration.
With a connected repository
Link the repository as well when you want the app and build service associated with repository metadata in the dashboard. Wodby then follows the pipeline's builds itself, the dashboard can start a new build on the selected branch after the first run, and builds from other branches are refused. Your pipeline still supplies the checkout and runs the Wodby CLI build and deploy commands.
Without a connected repository
Leave the repository unlinked when you want the least provider access and coupling, or when the CI or Git provider is not supported as a Wodby integration. The pipeline checks out the code, and Wodby trusts the Git ref, commit, author, and message submitted by Wodby CLI. Your external CI remains the source of truth.
Follow Deploy to Kubernetes from any CI with Wodby for the Custom CI setup and pipeline commands. Provider-specific examples are also available for GitHub Actions and GitLab CI.
With Wodby CLI
# A source using deployment type "ci", or a migration without a usable linked
# repository, automatically gets a create-or-reuse Custom CI integration.
# Optionally select a specific existing target CI integration instead:
migration_args+=(
  --target-ci-integration-id TARGET_CI_INTEGRATION_ID
)

# Or move the instance to Wodby CI, which builds from the linked repository.
# The repository needs .wodby/pipeline.yml; the preview says when it is missing.
# migration_args+=(
#   --target-wodby-ci
#   --target-git-integration-id TARGET_GIT_INTEGRATION_ID
# )
After the pipeline runs, rerun the same --apply command. Keep the choice unchanged on every run.
Operational checklist
- Choose the source instance, app, or server. Wodby Agent lists what your Wodby 1 key can migrate. Make sure the instance, its parent app, services, routes, and available backup components are stable.
- Decide which successful backup to import, who will test and approve the imported app, change DNS, and approve rollback or completion.
- Lower DNS TTL ahead of time when practical, and reserve a cutover window that includes any optional final backup, import time, DNS propagation, route deployment, and certificate issuance.
Keep Wodby 1 intact throughout the migration and for an agreed rollback window afterward. If Wodby 2 accepts writes after cutover, the rollback procedure must account for those new writes.
Add one source instance to an existing Wodby 2 app
This is useful when a Wodby 1 app has many instances and you want to migrate and accept them one at a time while keeping them in one Wodby 2 app. Ask the agent to add the instance to that app. The app keeps its organization or project ownership, and the cluster must be available to it.
When the app's existing app environments use one stack, the migration uses that stack. If they use more than one, the preview stops and asks you to choose. The migration does not attach an unrelated stack silently.
Existing app environments are protected.
The preview blocks if the target app already contains an app environment with the source instance name. It never overwrites or adopts that app environment. The migration publishes a new stack revision and creates only the new app environment; all existing app environments remain pinned to their current revisions. A restart or rollback never deletes the app it found.
Every preview reads the Wodby 1 app's other instances to decide which settings belong to the shared stack and which belong to a single instance, so migrating instances one at a time produces the same stack configuration as migrating the whole app at once. A value that every instance shares becomes a stack value; a value that differs by environment is scoped to that environment; a value that differs between instances of the same environment becomes an app environment override. A later migration does not rewrite settings an earlier one established. Those other instances are only read until you migrate them.
With Wodby CLI
wodby migrate wodby1 instance SOURCE_INSTANCE_UUID \
  --target-app TARGET_APP_ID \
  --target-cluster TARGET_CLUSTER
Prefer an app ID so a later rename cannot make a resume ambiguous, and omit --target-stack-id so the CLI infers the app's stack.
Optional: migrate every instance of an app, or every app on a server
Ask for a whole app when all its source instances should be planned and created together as app environments in one new Wodby 2 app. Backup selection, acceptance, and DNS readiness then apply to all of them, and all app environments share the single app-specific stack; their environment types control environment-scoped variables and cron schedules. Name instances to leave out when some should stay. An app migration always creates a new app; to add instances to an existing app one at a time, migrate them individually.
Ask for a server when one Wodby 1 server hosts several managed Drupal or WordPress apps that should all move to the same Wodby 2 organization, ownership scope, and cluster. The migration discovers the apps and instances hosted on that server, creates a new catalog-derived stack for every included app, and works through the apps one after another. A failure is recorded against its app while the rest continue. Leave out whole apps or single instances when needed.
Authorization is all or nothing.
The Wodby 1 key must belong to an active owner or admin of the server's organization and of every source app organization represented on it. Wodby 1 authorizes the complete inventory before exporting any app data, so a shared server is never returned as a partial migration.
The server scope also recognizes identical bundles of at least two customer variables used by at least two apps on the same compatible service. It creates one private custom variable provider and a matching integration, then links that integration into each app-specific stack. Integrations with identical SMTP or S3 credentials are likewise reused instead of duplicated.
One Git integration is enough when it exposes every app's repository; the migration finds each by name and, for Wodby CI, checks the pipeline at every selected ref. Name a different integration or repository only for the apps that need one. An app whose repository the integration does not expose is shown as unlinked and uses Custom CI instead of blocking the others. Migrate apps individually when they need different ownership, clusters, cutover windows, or unrelated decisions.
With Wodby CLI
wodby migrate wodby1 app SOURCE_APP_UUID --target-cluster TARGET_CLUSTER [target and mapping options]
wodby migrate wodby1 app SOURCE_APP_UUID --target-cluster TARGET_CLUSTER [same options] --apply
wodby migrate wodby1 app SOURCE_APP_UUID --target-cluster TARGET_CLUSTER [same options] --verify
# One reviewed plan for every app hosted on the source server.
server_args=(
  SOURCE_SERVER_UUID
  --target-cluster TARGET_CLUSTER
  # The API key selects the target organization. Optionally add
  # --target-project TARGET_PROJECT to override the cluster ownership default.
  --target-env-map prod=prod
)

# If every repository is visible through one integration, the CLI derives and
# looks up each repository name automatically.
server_args+=(
  --target-git-integration-id GIT_INTEGRATION_ID
)

# Use per-app mappings only for a different integration or name override:
# --target-repository-map 'SOURCE_APP_UUID=GIT_INTEGRATION_ID'
# --target-repository-map 'OTHER_APP_UUID=GIT_INTEGRATION_ID:OWNER/OTHER_REPOSITORY'

# Omit Git options for automatic Custom CI. Add --skip-code only when code
# delivery is intentionally outside the migration.
# Preview every app. Add --apply only after reviewing the full output.
wodby migrate wodby1 server "${server_args[@]}"
Repeat --exclude-instance UUID_OR_NAME (or APP/INSTANCE for a server) and --exclude-app UUID_OR_NAME, and use --target-repository-map for apps with another integration or repository name. Exclusions are pinned into the applied plan, so use the same selectors when resuming or verifying. A server migration keeps an isolated state file per app derived from the --state-file base path; add --verbose to see the paths. It exits nonzero after reporting succeeded and failed totals; resume with the same --apply command.
1. Preview the migration
Open Chats in your Wodby 2 organization and ask Wodby Agent to migrate the instance, naming the Wodby 2 cluster, for example:
Migrate the prod instance of my Wodby 1 app example to the cluster main.The agent finds the source with your Wodby 1 integration, previews the plan, and explains every blocker and warning in plain words. It asks before anything that only you can decide and offers the options from Choose how the app is built and run. Read every review item: migration details, warnings, the enabled services that will not be migrated, and blockers. Warnings include safe target downgrades such as cron schedules or automatic-backup presets staged disabled because of the target subscription.
Resolve all blockers before you start: each one names the decision it needs, such as an environment type, a stack, a service, a version, or an import mapping, and the agent previews again with your answer. The approved plan pins the immutable target stack revision and the exact target service, integration, build, import, and Wodby 1 backup identities, so later catalog changes or newer source backups cannot silently substitute a different revision or snapshot. A started migration refuses a changed source configuration or changed choices; to change a choice, ask the agent to preview again and restart it.
With Wodby CLI
Supply the target cluster on every run; the API key identifies the target organization. For a managed or recognized forked Drupal or WordPress source, omit --target-stack-id so the CLI creates the app-specific catalog stack, and omit --target-project to follow the cluster's ownership. This example selects Wodby CI and keeps every option in one Bash/Zsh array for reuse:
# Load these through your secret manager before running the command:
# WODBY1_SOURCE_TOKEN
# WODBY_API_KEY

# Bash/Zsh array: define the common arguments once.
migration_args=(
  SOURCE_INSTANCE_UUID
  --target-cluster TARGET_CLUSTER
  # The API key selects the target organization. Optionally add
  # --target-project TARGET_PROJECT to override the cluster ownership default.
  --target-env-map prod=prod
  --wait-timeout 60m
)

# Recommended when the source repository is available: use Wodby CI.
# Select the Git integration that exposes the source repository.
migration_args+=(
  --target-git-integration-id TARGET_GIT_INTEGRATION_ID
  --target-git-ref main
  --target-git-ref-type branch
)

# The CLI derives owner/repository from the Wodby 1 repository URL and looks
# for that exact name in the selected integration. If the names differ, add:
# --target-repository-name 'OWNER/REPOSITORY'

# Preview only. This does not create local files or change either platform.
wodby migrate wodby1 instance "${migration_args[@]}"
Default mappings work only when the source and target are unambiguous. Repeat the relevant flags for each exception:
--target-env-map SOURCE_TYPE=TARGET_TYPE
--target-app EXISTING_TARGET_APP_ID
--target-stack-id EXISTING_TARGET_STACK_ID
--target-stack-map '[APP/][INSTANCE/]SOURCE_STACK=TARGET_STACK_ID'
--target-service-map '[APP/][INSTANCE/]SOURCE_SERVICE=TARGET_SERVICE'
--target-version-map '[APP/][INSTANCE/]SOURCE_SERVICE=TARGET_VERSION'
--target-import-map '[APP/][INSTANCE/]COMPONENT=TARGET_SERVICE:TARGET_IMPORT'
- Environment mappings assign each source instance type to a fixed Wodby 2 environment type:
prod,staging,test,dev, orfeature. - Stack-ID and service mappings can be scoped with a source app or instance UUID or name followed by
/. - Import mappings connect a source component such as
databaseorfilesto one target service import capability. - For Wodby CI, add
--target-code-servicewhen more than one target service can build the repository.
Preview does not write a plan, state, or lock file. Keep all selectors, mappings, Git options, and skip choices identical on every run. Correct any mistake and review a new preview before running --apply. Do not point an older Drupal app at a newer major-version stack merely to clear a blocker; upgrade and test the application first.
2. Review or choose the source backup
The migration does not create a Wodby 1 backup. By default it selects the newest successful file for each required component of every included instance. Database and files can therefore come from different successful backups when the newest backup contains only one component. The preview shows each component's backup, its completion time, size, and target import, and warns when one instance uses mixed snapshots. There is no maximum backup-age requirement and maintenance mode is not required. Ask the agent to import another successful backup when you need a different one.
An explicitly selected backup must belong to the source instance, be successful, and contain every required component; it pins all components to that one snapshot. Automatic selection instead pins every component independently to a successful backup file. Every selected file must be available through HTTPS. The migration pins those exact backups before making target changes and reuses them even if Wodby 1 creates a newer backup later.
Optional: minimize writes after the snapshot
Changes made after the selected backup completed are not migrated. If that gap matters, optionally enable maintenance mode from Instance > Stack > Settings in Wodby 1, create a backup manually, wait for it to succeed, and ask the agent to preview again. The new backup then becomes the default. Keep maintenance mode enabled until cutover if your process requires a write-free migration window. Enabling maintenance mode does not create a backup; the Wodby 1 backup action remains manual.
With Wodby CLI
# One instance: import a specific successful backup.
migration_args+=(--source-backup BACKUP_UUID)

# One app: override selected snapshots by instance.
wodby migrate wodby1 app SOURCE_APP_UUID --target-cluster TARGET_CLUSTER \
  --source-backup prod=PROD_BACKUP_UUID \
  --source-backup dev=DEV_BACKUP_UUID

# One server: qualify instance names with the app.
wodby migrate wodby1 server SOURCE_SERVER_UUID --target-cluster TARGET_CLUSTER \
  --source-backup example/prod=PROD_BACKUP_UUID
Exact instance UUIDs may also be used instead of names.
3. Start the migration and import the selected data
When the plan has no blockers, the agent summarizes it and asks whether to start. After you approve, the migration runs as a task that you can follow on its task page or by asking the agent how it is going. It creates and publishes the app-specific stack configuration, resolves reusable integrations, creates the app and app environment, reconciles supported service states and routes, creates route auths for protected custom domains and the replacement technical domains, then deploys and imports data. With Wodby CI it also connects, builds, and deploys the reviewed Git source. If the migration pauses, for example until your third-party CI pipeline runs once, the agent tells you what to do; then ask it to continue.
For a Wodby 1 domain with custom TLS, the preview looks for an active Wodby 2 custom certificate in the target organization that covers the exact hostname, including a matching wildcard name. If exactly one is found, the plan pins and attaches it without reading or exporting its private key. The basic-auth password is transferred only in memory. If the target organization has no paid custom-domain entitlement, each custom domain is staged disabled.
Imports run one component at a time. Before each one, the migration refreshes the Wodby 1 export to get a current download address for the selected backup and confirms that the protected configuration and selected snapshot have not changed. Download addresses are not saved with the plan; Wodby 2 keeps one only while its import runs. Keep the selected source backup until verification and the agreed rollback window are complete. The imported snapshot stays fixed even if Wodby 1 accepts newer writes; those writes are not migrated.
Migrated cron schedules stay disabled after apply, so scheduled jobs such as mail, payments, or syncs with external systems do not run on Wodby 1 and Wodby 2 at the same time. Verification enables them once DNS points to Wodby 2.
The first deployment runs before the data import, so post-deployment scripts such as drush deploy may fail on the empty database. The migration reports this as a warning and continues. If your application needs those steps after the import, run them once on the technical URL.
With Wodby CLI
Rerun the reviewed command with --apply. The CLI shows the plan again and asks for confirmation; no hash is required. Only after you approve does it write the plan and state under the system temporary directory, or next to --state-file, with owner-only permissions, and print their paths. Use --yes only in an intentionally unattended workflow. The files never store protected source values, basic-auth passwords, integration credentials, or backup download addresses, but treat them as sensitive records.
# The preview shows the selected backup UUID, completion time, components,
# and size. Rerun the reviewed command with --apply. No plan hash is required.
wodby migrate wodby1 instance "${migration_args[@]}" --apply

# Apply asks for interactive confirmation. For an intentionally unattended
# invocation, add --yes after reviewing the same preview in advance.
# wodby migrate wodby1 instance "${migration_args[@]}" --apply --yes

# Test the imported app on its technical URL. Change DNS only after it passes.
# Once every hostname resolves to Wodby 2, verify the performed migration.
wodby migrate wodby1 instance "${migration_args[@]}" --verify
Final acceptance gate before DNS
Do not change DNS as soon as the migration is applied. Open the Wodby 2 technical URL and confirm that the app is running with the final imported database and files. DNS should be the last customer-controlled action that sends production traffic to the new platform. Wodby Agent lists these steps when the migration is applied.
- Confirm every enabled service is healthy and the approved Git ref is deployed with no pending rebuild or redeploy.
- If custom domains were staged disabled on a free plan, upgrade the target organization and enable those domains before changing DNS. Wodby checks the paid entitlement again when each domain is enabled.
- For every Wodby 1 custom-TLS domain, confirm that the preview named the Wodby 2 certificate to attach. If no certificate—or more than one—matches, add a custom certificate in Wodby 2 and attach it to the migrated route before changing DNS, or ask the agent to use Let's Encrypt instead. Private keys are never transferred from Wodby 1.
- Search indexes are not migrated: Wodby 1 backups contain the database and files only. If the app uses Solr, Elasticsearch, or OpenSearch, reindex its content on Wodby 2, for example with
drush search-api:index, and test search. - Mail sent while you test goes out through the migrated mail settings, unless test environments deliver it to Mailpit. Use test accounts, and avoid actions that send mail to real users.
- For Drupal, test administrative login, database-backed content, public and private files, caches, and the configuration of cron, queues, mail, and external integrations.
- For WordPress, test administrative login, pages and posts, media, permalinks, plugins, and the configuration of scheduled tasks, mail, and external integrations.
- Confirm the migration owner, application owner, and DNS owner agree that the target is ready, and that the rollback procedure and monitoring are ready before approving cutover.
Keep acceptance checks read-only where practical. If a test writes to Wodby 2, remove the test data or explicitly account for that write in the rollback plan. Do not re-enable writes on Wodby 1 or replace the snapshot after data synchronization has started.
What can only be tested after DNS?
The production hostname, its final redirects, and automatic Let's Encrypt issuance cannot be fully validated until DNS points to Wodby 2. An existing custom certificate can be attached and reviewed before cutover. The custom route configuration is already deployed; validate hostname routing and certificates immediately after cutover. Everything else should be approved on the technical URL first.
The migration also preserves Wodby 1 HSTS behavior. After the certificate is active, Wodby 2 sends a two-year HSTS policy and includes subdomains when that option was enabled on the source domain. The header is intentionally emitted only over HTTPS.
4. After acceptance, change DNS
After the final acceptance gate passes, change each custom hostname to the selected Wodby 2 cluster using the records appropriate for that cluster. The migration does not change DNS. Wait until public resolution returns the target cluster before you ask the agent to verify.
If a hostname is proxied through a CDN or DNS provider, switch its record to DNS-only or otherwise bypass the proxy for cutover. Verification needs direct public DNS resolution to return the target cluster addresses. Re-enable the proxy only after the routes and certificates are ready and your tests pass.
Verification refuses to complete while a hostname resolves outside the selected cluster. Let's Encrypt certificates can only be issued after the hostname reaches the target, so include certificate time in the maintenance window. During DNS propagation, some visitors may still reach the maintenance-mode Wodby 1 app.
Once traffic has moved, disable the cron jobs of the Wodby 1 instance so they stop running against the old data. Enable them again only if you roll back to Wodby 1.
5. Verify and complete
Ask the agent to verify the migration. Verification checks that DNS resolves to the selected cluster, reads the target app back, and validates the app and app environment relationships, service state, migrated environment variables, cron schedules, routes, authentication, certificates, completed imports, and workload status. It enables the migrated cron schedules before it checks them, and marks the migration complete only after all checks pass.
Verification confirms each expected route auth by its scope and login, but cannot compare write-only secret values or basic-auth passwords. Repeat the critical checks through the production hostnames, confirm HTTPS certificates, redirects, route protection, indexing rules, scheduled jobs, mail, and external integrations, then exercise controlled writes and create a Wodby 2 backup. Keep Wodby 1 for the agreed rollback window; the migration does not delete it.
With Wodby CLI
Rerun the same command with --verify. It marks the local migration state complete only after all checks pass.
Resume safely after an interruption
The migration records checkpoints, so an interrupted run continues where it stopped and does not repeat completed operations. Ask the agent to continue it. To start over with new choices instead, ask it to preview again and restart: the migration first removes what it created in Wodby 2, keeping apps and integrations that existed before. A restart is refused after successful verification and while the result of an operation is uncertain.
If a network interruption makes a create operation uncertain, the migration stops rather than risk creating a duplicate. On resume it can adopt only one uniquely matching resource created in the same time window. If that is not possible, check Wodby 2 for the resource; once you are sure the original operation did not take effect, ask the agent to retry exactly that operation.
With Wodby CLI
Rerun the same command with --apply, the same arguments, and the same Wodby 1 token. The CLI reloads the plan and state from the paths it printed when apply began. Do not run two commands for the same state file at the same time; the adjacent .lock file prevents it.
# Normal recovery: preserve the applied plan and completed work.
wodby migrate wodby1 instance "${migration_args[@]}" --apply

# Start over: the CLI lists what it will remove first and asks to confirm.
wodby migrate wodby1 instance "${migration_args[@]}" --apply --restart
By default the plan and state live in a temporary directory that the operating system is free to clear, and both resuming and --rollback need them. For any migration you might want to resume or undo, pass --state-file with a path outside the temporary directory and keep it until you have accepted the migration. --wait-timeout sets how long the CLI waits for each operation (30 minutes by default); a timeout stops the local wait, not the remote operation. Use --retry-ambiguous OPERATION_ID with the exact operation ID the CLI printed, and never delete the state file to force a retry.
Roll back a migration you decided not to keep
If you decide against a migration before DNS cutover, ask the agent to roll it back. Rollback removes what the migration created in Wodby 2, and the dashboard asks you to confirm twice. Wodby 1 is never touched.
It deletes only what the migration recorded creating: the app it created, together with every app environment, service, route, and imported database and files under it; the stack it generated for that app; and the integrations it created. If you added the instance to an app that already existed, that app is kept and only the app environments the migration added are removed. Integrations it reused rather than created are kept, because other apps in the organization may depend on them. Rollback also lists what it leaves in place for you to remove: a custom variable provider created for shared variables, which other migrated apps may use, and configuration added to a stack that existed before the migration. Deletion follows Wodby 2's dependency order, and resources that are already gone count as success, so an interrupted rollback can be run again.
Rollback refuses once verification has started.
Verification starts only after every hostname resolves to Wodby 2. If it then reports a problem, fix it and ask the agent to continue the migration, which repeats its steps without recreating what exists, then verify again.
After successful verification, changing DNS back does not allow a rollback. Undoing the migration then needs a separate plan for any writes accepted by Wodby 2, DNS reversal, and removing the Wodby 2 resources. Confirm that Wodby 1 serves the intended data before removing anything from Wodby 2.
With Wodby CLI
wodby migrate wodby1 instance "${migration_args[@]}" --rollback
The command prints what it will delete and asks you to type the app name to confirm, or the server UUID for a server migration; use --yes for a non-interactive run. Before deleting anything, it checks that WODBY_API_KEY and --target-cluster resolve to the organization and cluster the migration used. It needs the state file; if that has been cleared, remove the app and its generated stack by hand. The same --rollback option on the server command rolls back every app.
Blockers that require a decision
- Missing or inactive organization
owneroradminmembership on either side. - Target project (when selected or inferred), cluster, environment type, stack, service, or import mappings that are missing, inconsistent, or ambiguous.
- An unrelated Wodby 2 app with the exact source app name. A resumed migration can reuse only the app it created. For a one-instance migration, choose an intended existing app explicitly.
- A selected target app that has incompatible organization or project ownership, has no unambiguous stack, or already contains an app environment with the source instance name.
- A repository selected for Wodby CI without
.wodby/pipeline.ymlat the selected Git ref. A missing repository match itself is a warning and switches that app to unlinked Custom CI. - A fully custom or unrecognized Wodby 1 stack without an explicit Wodby 2 stack and service mapping. A fork whose metadata identifies Drupal or WordPress instead uses the managed path described above.
- A target free-plan app-service allowance that is smaller than the enabled service count required by the migration.
- Unsupported custom service configuration. The migration blocks rather than guess how a Wodby 1 override should translate.
- A variable set to an empty value in Wodby 1 when the Wodby 2 service or stack sets its own value for it.
- Redacted SMTP or S3 secrets, inconsistent relay values that cannot be scoped by environment type, an unsupported backup mirror provider, or an S3 backup preset on a target plan without automatic-backup support.
- Invalid cron entries, unstable source resources, missing backup components, or a selected backup that is failed or internally inconsistent.
- Wildcard, unresolved, or CDN-proxied custom hostnames that cannot pass direct-resolution DNS safety checks.
Resolve blockers and preview again before you start. If target resources have already been created, keep the migration and ask the agent to restart it with the new choices, or contact Wodby support, before attempting a different plan.