Backend guide
Run Self-Hosted Supabase for Your App
Supabase gives an app a database, sign-in, file storage, and live updates behind one API. Self-hosting it keeps your users and their data in your own cluster. This guide runs Supabase on Wodby as the backend of a small notes app, from the first deployment to sign-in with GitHub, backups, and updates.
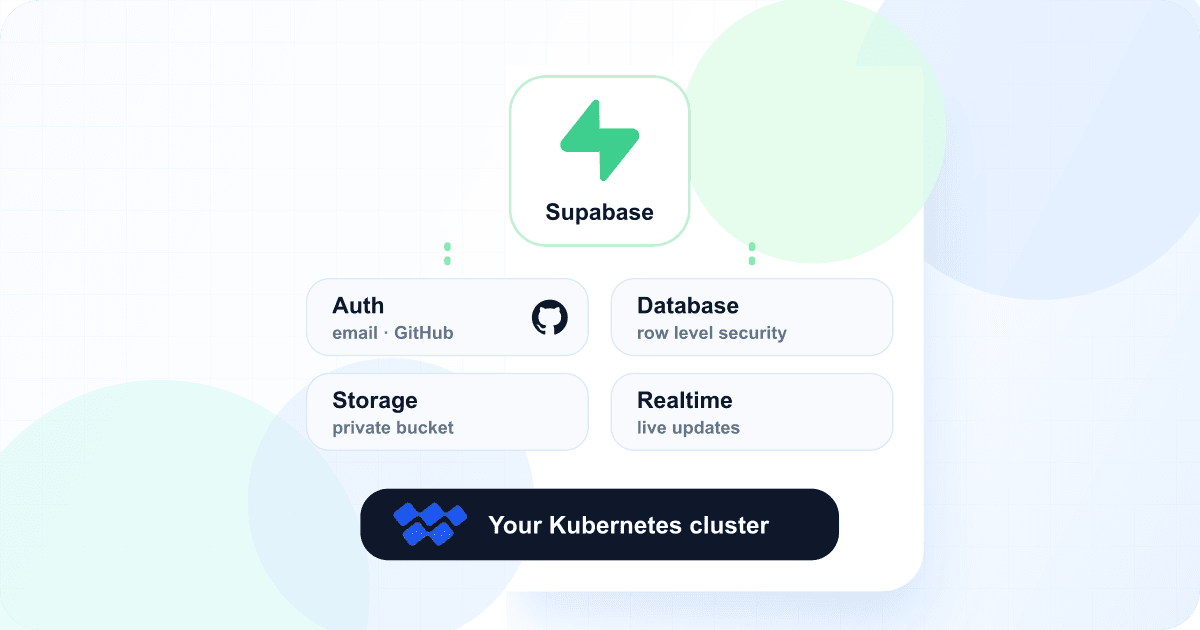
What you will build
A backend for a notes app where people sign in with their email address or GitHub account, keep private notes, attach files, and see new notes appear in every open tab. Every part is a standard Supabase feature:
- Auth signs users in and sends confirmation emails through your email provider.
- The database keeps the notes, and row level security stops anyone from reading someone else's.
- Storage keeps attachments in a private bucket with one folder per user.
- Realtime pushes each new note to the user's other tabs and devices.
Wodby runs one complete Supabase project per app environment: a PostgreSQL database with Supabase's extensions, plus Auth, the REST API, Realtime, Storage, and Studio behind one HTTPS address. It generates the project's keys, keeps the database port private, and backs up the database and stored files.
What you need
- A Wodby account and a connected Kubernetes cluster.
- An email provider for sign-up and password-reset emails, such as Amazon SES, Postmark, Resend, or any SMTP server. See the supported SMTP providers.
- A GitHub account, for the sign-in with GitHub step. You can skip that step and use email sign-in only.
1. Create the Supabase app
- Open the Supabase stack in the Wodby catalog and create an app from it.
- Under Authentication email, attach an integration of your email provider, and set Email sender address to an address the provider lets you send from. Both are required: Auth sends its confirmation and recovery emails through them.
- Set Application site URL to the address of your app, such as
https://notes.example.com. Users land there after confirming their email or signing in. Add other addresses your app runs at, such ashttp://localhost:3000for local development, to Additional allowed redirect URLs. - Deploy. When the deployment finishes, open the environment's domain under Endpoints: that is your Supabase URL.
The domain opens Supabase Studio behind a password prompt. Sign in with the user name supabase and the dashboard_password token from the Supabase service's Configuration → Tokens tab. The same tab shows the project's generated publishable_key and secret_key.
With Amazon SES, give the integration a regular IAM access key; Wodby turns it into the SMTP password for your region. The sender address must be verified in SES, and while your account is in the SES sandbox, it can only send to verified addresses.
2. Create the tables and the bucket
In Studio, open the SQL Editor and run:
-- Notes: each signed-in user sees and changes only their own notes.
create table public.notes (
  id bigint generated always as identity primary key,
  user_id uuid not null default auth.uid() references auth.users on delete cascade,
  body text not null,
  attachment text,
  created_at timestamptz not null default now()
);

alter table public.notes enable row level security;

create policy "Read own notes" on public.notes
  for select to authenticated using ((select auth.uid()) = user_id);
create policy "Add own notes" on public.notes
  for insert to authenticated with check ((select auth.uid()) = user_id);
create policy "Delete own notes" on public.notes
  for delete to authenticated using ((select auth.uid()) = user_id);

-- Send changes to subscribed browsers.
alter publication supabase_realtime add table public.notes;

-- Attachments: a private bucket with one folder per user.
insert into storage.buckets (id, name, public) values ('attachments', 'attachments', false);

create policy "Upload to own folder" on storage.objects
  for insert to authenticated
  with check (bucket_id = 'attachments' and (storage.foldername(name))[1] = (select auth.uid())::text);
create policy "Read own folder" on storage.objects
  for select to authenticated
  using (bucket_id = 'attachments' and (storage.foldername(name))[1] = (select auth.uid())::text);
The policies are the security of the app. The browser talks to Supabase directly with the public key, so the database itself decides what each signed-in user can read and write: their own notes, and files in the folder named after their user ID.
The database port has no public route, so tools on your laptop can't connect to it. Keep this SQL in your repository and run it in the SQL Editor of each environment, or from the database service's web terminal with psql -U postgres.
3. Connect your app
Your frontend needs the Supabase URL and the publishable key. If it runs on Wodby too, add them to its app service under Configuration → Variables:
NEXT_PUBLIC_SUPABASE_URL=https://<your Supabase domain>
NEXT_PUBLIC_SUPABASE_PUBLISHABLE_KEY=<publishable_key>
Next.js copies NEXT_PUBLIC_ variables into the JavaScript it builds, so select the Build scope as well as Runtime for these two, and declare them in your Dockerfile before the build step:
ARG NEXT_PUBLIC_SUPABASE_URL
ARG NEXT_PUBLIC_SUPABASE_PUBLISHABLE_KEY
RUN npm run build
Wodby passes build variables as Docker build arguments. See environment variables. Never put secret_key in a browser build: it skips row level security. Use it only in server code, as a variable marked Secret.
Then the whole backend of the notes app is one small module:
import { createClient } from '@supabase/supabase-js';

export const supabase = createClient(
  process.env.NEXT_PUBLIC_SUPABASE_URL,
  process.env.NEXT_PUBLIC_SUPABASE_PUBLISHABLE_KEY,
);

// Sends the user to GitHub and back to this site, signed in.
export const signInWithGitHub = () =>
  supabase.auth.signInWithOAuth({
    provider: 'github',
    options: { redirectTo: window.location.origin },
  });

// Uploads the file into the user's own folder, then saves the note.
export async function addNote(body, file) {
  const { data: { user } } = await supabase.auth.getUser();
  let attachment = null;
  if (file) {
    attachment = `${user.id}/${file.name}`;
    const { error } = await supabase.storage.from('attachments').upload(attachment, file);
    if (error) throw error;
  }
  const { error } = await supabase.from('notes').insert({ body, attachment });
  if (error) throw error;
}

// The user's notes, newest first. Row level security leaves out everyone else's.
export const listNotes = () =>
  supabase
    .from('notes')
    .select('id, body, attachment, created_at')
    .order('created_at', { ascending: false });

// A link to an attachment that works for one hour.
export const attachmentUrl = (path) =>
  supabase.storage.from('attachments').createSignedUrl(path, 3600);

// Calls onNote for every note the user adds, from any tab or device.
export const watchNotes = (onNote) =>
  supabase
    .channel('notes')
    .on('postgres_changes', { event: 'INSERT', schema: 'public', table: 'notes' },
      ({ new: note }) => onNote(note))
    .subscribe();
None of these calls need a server of your own. Sign-up with email and password works with supabase.auth.signUp: Auth emails a confirmation link through your email integration, and the link brings the user back to your site URL.
4. Add sign-in with GitHub
- In GitHub, create an OAuth app or a GitHub App. Set its callback URL to your Supabase URL followed by
/auth/v1/callback, and create a client secret. For a GitHub App, set the Email addresses account permission to read-only: Supabase needs the user's email, and without it sign-in fails. - On the Supabase app service, add these variables under Configuration → Variables, each for the
authworkload andauthcontainer, and mark the client secret as Secret:GOTRUE_EXTERNAL_GITHUB_ENABLED=true GOTRUE_EXTERNAL_GITHUB_CLIENT_ID=<client ID> GOTRUE_EXTERNAL_GITHUB_SECRET=<client secret> GOTRUE_EXTERNAL_GITHUB_REDIRECT_URI=https://<your Supabase domain>/auth/v1/callback - Deploy the Supabase service.
signInWithGitHub()from the module above now works.
Google, GitLab, and the other providers Supabase supports work the same way with their own GOTRUE_EXTERNAL_* variables; the Supabase stack guide links to the full list.
5. Back up and restore
A Supabase project keeps its data in two places: the database, which also holds users and the records of stored files, and the files themselves. Wodby backs up both, under Data → Backups:
databaseon the Supabase PostgreSQL service: all tables, users, and roles.objectson the Supabase service: the stored files.
Add a backup preset with a schedule so both run every night, to Wodby Blob Storage or your own S3 bucket. To restore, run the database and objects imports from backups taken at the same time: the database knows which files exist, so a file without its record stays invisible, and a record without its file can't be downloaded. The database import starts the database on a fresh volume; the objects import replaces the files, removing ones added after the backup.
Neither backup contains the project's keys and passwords on the Tokens tab. They don't change on their own, but keep a copy: data encrypted with them can't be read without them. See backups and imports.
6. Add a staging environment
Create a second environment of the app from the same stack. It is a separate Supabase project with its own database, keys, and Studio password, so testing never touches production data.
- Run the SQL from step 2 in its SQL Editor; the new database starts empty.
- Variables you added to the Supabase service aren't copied to a new environment. Add the GitHub variables again, with the staging callback URL, and add that URL to your GitHub app or create a second one.
- Point your frontend's staging environment at the staging Supabase URL and publishable key.
7. Keep Supabase up to date
New Supabase versions come as new versions of the stack's services. When your organization's Supabase stack has updates, its Operations tab shows them in the Service update card; update the services there, then upgrade each environment from its Stack → Operations tab, staging first. See stack updates.
Take a backup before you upgrade production. Rolling back an upgrade restores the services, not database changes a new version made.
What the stack leaves out
Each component runs as one replica. Edge Functions, connection pooling, the analytics and logs service, and high-availability PostgreSQL aren't included. Run server-side code as its own service in your app instead, and keep the secret key there.
Where to go next
- Turn on Disable new signups on the Supabase service for an invite-only app; you then add users in Studio.
- Keep files in S3 instead of the volume: connect the optional S3 integration and set S3 bucket. Wodby doesn't back up the bucket itself.
- Read the Supabase stack guide for all settings, the database rules, and limits.